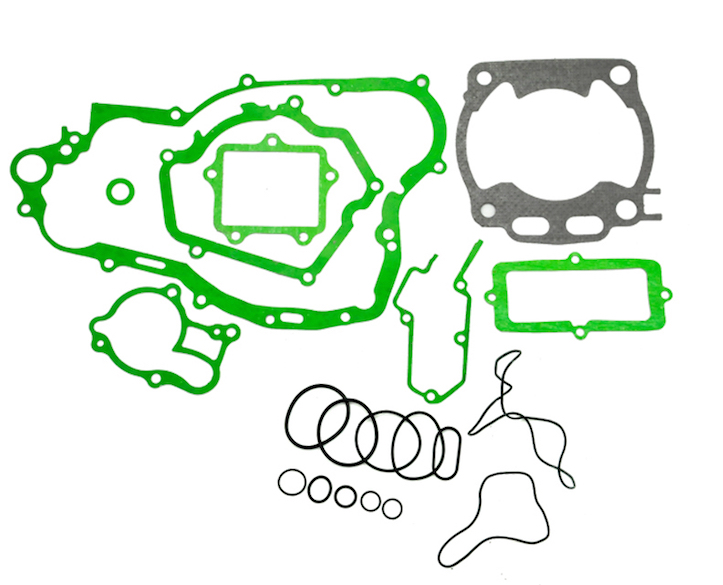
Gaskets
I’ve been helping Beau Sullivan from the Touratech warehouse recently on his 1989 Suzuki GS500E. While walking him though the engine rebuild process I realized how little thought is often given to the gaskets. Their function, importance, and the need of proper installation, seem to be glossed over in manuals. I find that discovering not just how to do a task, but why it needs to be done, is the most complete way to learn. The additional background information normally comes in handy when trouble shooting or making decisions on whether a part needs to be replaced or if it can be reused.
What does a gasket do?
The purpose of a gasket is to fill any imperfections between two mating surfaces. It is possible to have both surfaces machined to a tolerance that is so precise that a gasket is not required. This level of precision is very expensive and normally requires both parts to be “mated” to each other, resulting in both parts being replaced as a set. Looking at a paper gasket, it is easy to see that they are very thin. Thickness is the degree that they can seal something. This is generally filling in the small marks left from the cutting tools on the surface during manufacturing, or the slight difference in the flatness of the parts (we are talking thousands of an inch over the whole surface) being bolted together. On some parts you might find a reusable rubber gasket (e.g. valve covers), an o-ring (e.g. the clutch cover on a KTM LC8), two-stroke engine case halves often call for a semi-drying liquid gasket (e.g. ThreeBond 1194 or Permatex MotoSeal 1).
When should I replace a gasket?
The short answer is: Whenever you remove one. In practice if the gasket doesn’t tear, often it can be reused. This however, does present a risk of leakage. A used gasket might not have the ability compress and fill any voids if it has already been used. Head gaskets and base gaskets should never be reused…ever. Most head gaskets are made of a malleable metal, once compressed they will not compress effectively a second time. The combustion chamber on a motorcycle engine is under a lot of pressure (130-180 psi in a normal range of pressure when checking compression).
Any leak from the head gasket will cause problems, and if they go unchecked engine damage will likely occur. On a four-stroke engine, the base gasket is not as important as it is on a two-stroke. On a two-stroke, the base gasket is a critical component in preventing the engine from inadvertently running lean. The charge from the carburetor on a two-stroke is drawn into the case around the crank to lubricate the main bearings (this is why oil is mixed with the gas) before being sucked through the ports, into the combustion chamber.
An air leak from the base gasket will cause the fuel-air mixture to become too lean. Shortly after buying my 1972 Husqvarna 400CR it exploded in my driveway because of this lean mixture. During the autopsy I found the previous owner had failed to even install a base gasket. Close to $1,000 in damages (the piston, cylinder, and connecting rod all were destroyed) due to a missing $3 gasket.
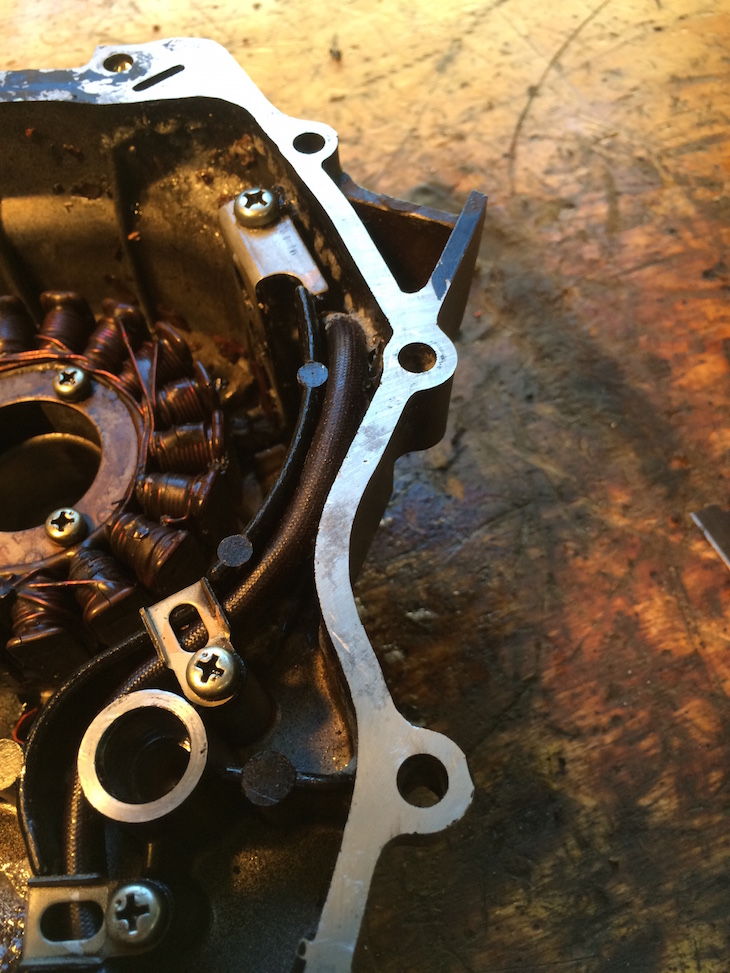
Removing the old gasket and preparing the mating surface
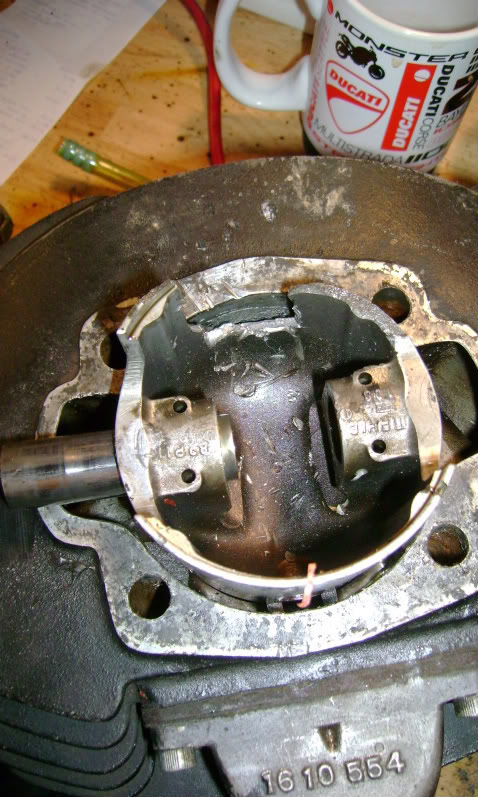
You are going to want to remove all of the old gasket material from both surfaces before installing the new gasket. In many cases, (especially on newer motorcycles) the old gasket might just pull off. The example used here is from a 25 year old motorcycle with over 30,000 miles on it. It is about as bad as it gets.
Tools:
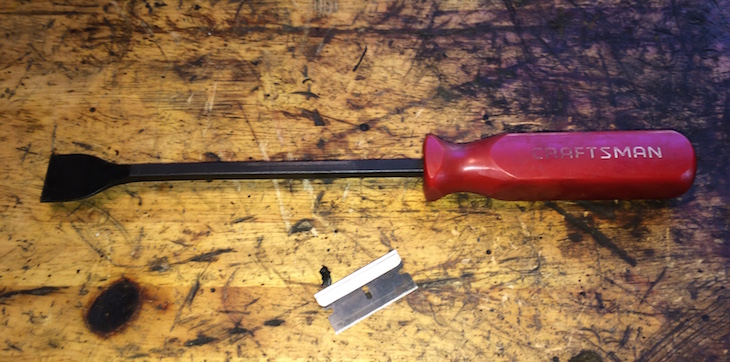
Razorblade
CRC Technician Grade Gasket Remover
Brake cleaner
Step 1 – Rip and Tear
Remove as much of the gasket as you can with your bare hands.
Step 2 – Razor’s Edge
I show in the picture a red handled automotive-type gasket scraper. These tools work great deep in the engine-bay of a truck with a cast-iron engine block, but have no use on an aluminum motorcycle engine.
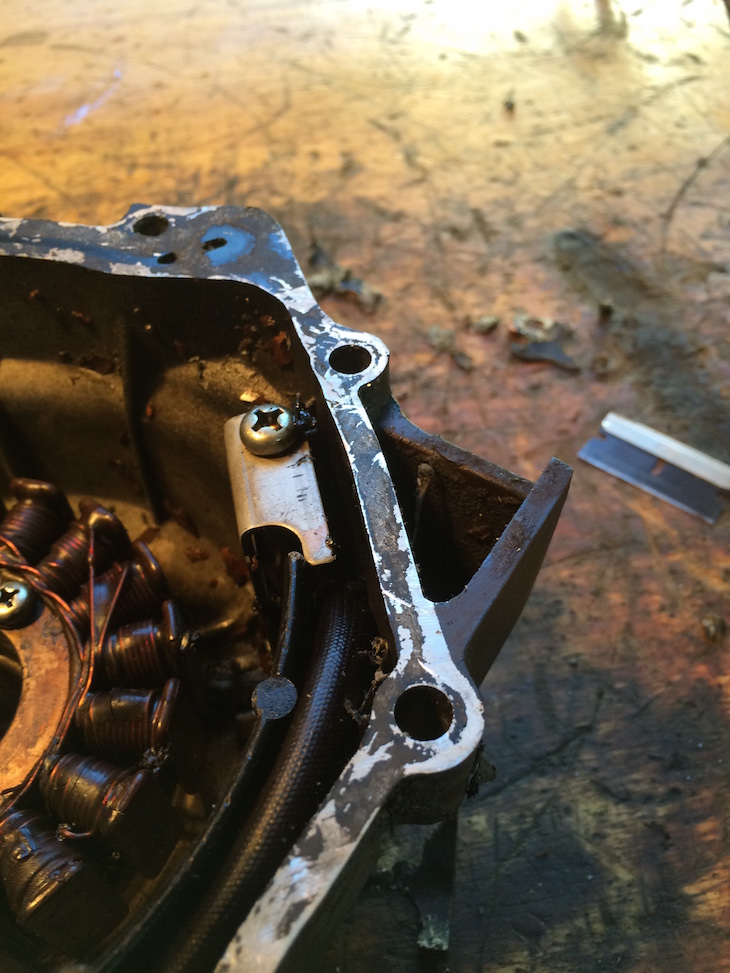
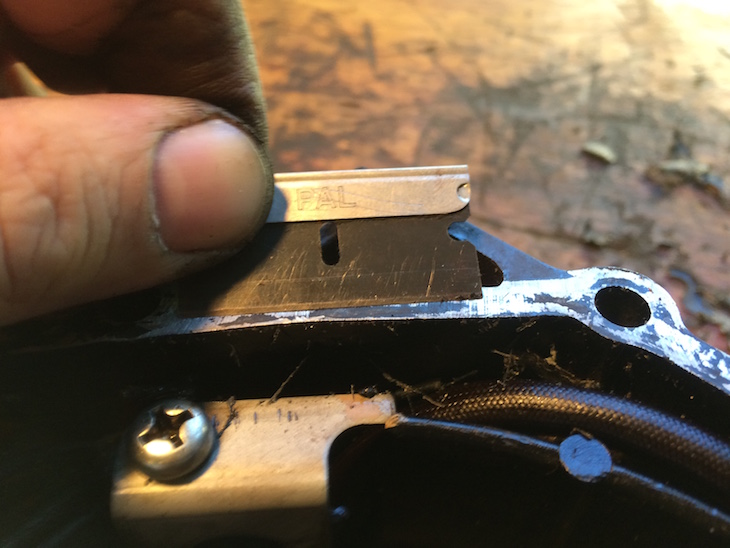 With the razorblade, slowly try to get under the gasket and try to work up the gasket material. I normally pinch the razorblade between the side of my index finger and thumb as shown. With my other hand I will use my thumb to push the blade. I find this method allows me finer control over the angle of the razorblade. If you get the razorblade under a section of gasket slowly wiggle the blade to move further under the gasket. Sometimes you will be able to then grab the raised up bit of gasket and pull a section off. Just like many of us learned in Cub Scouts, be mindful of where the razorblade will cut if you slip. Keep your fingers out of that path.
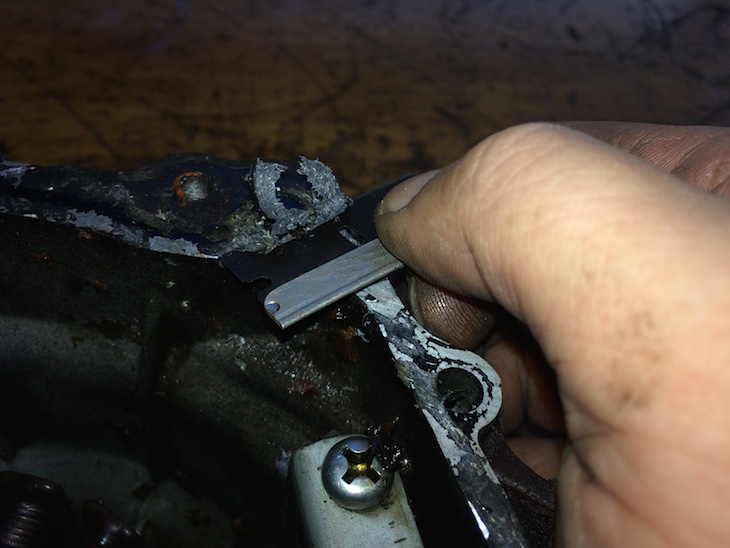 Remember the razorblade is steel, and it can remove aluminum if you are not careful in the process. It is important to keep the razorblade level with the mating surface that is being cleaned, this will help prevent causing any nicks to the surface. I will generally work around the surface (clockwise or counter-clockwise) at this stage. Once the bulk of the gasket has been removed I will start to work the razorblade the other way (with the whole width of the blade in use). The same methods are used, just from a different angle of attack.
Note: If you do not have any gasket remover, completely remove the gasket with the methods in this step and skip to step 4.
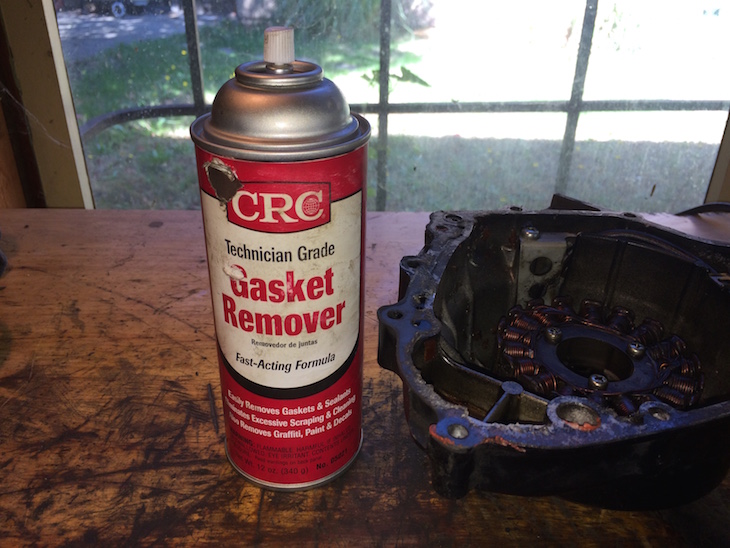
Step 3 – Fun With Chemicals
This step is not required, but I have found it to be a huge time saver. The CRC Technician Grade Gasket Remover is the only gasket remover I have found to work.
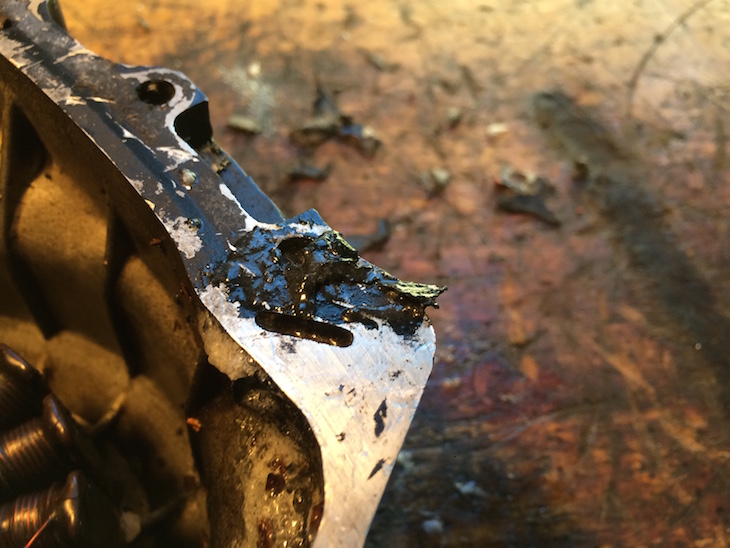 The gasket will start to look gooey so use the razorblade in the same manner as before and scrap off the rest of the gasket. This can take a few applications depending on how much gasket is still on the mating surface. Once the gasket has been fully removed I like to take a rag and rub the mating surface, this will often remove the last little pieces of gasket.
Step 4 – Make it Shine
I like to run my finger around the mating surface to make sure there are no imperfections or pieces of gasket missed by the eye. Sometimes gaskets will leave imprints of writing that was on the gasket, or small dark spots (as pictured). If you cannot feel them with your finger there is nothing to worry about. The part is now ready for a new gasket and reassembly.
Additional Notes:This is a guide not gospel, if holding the razorblade differently works better for you, do it that way. Just keep in mind the goal. The mating surfaces need to be clean for the new gasket to function properly. I am sure there might be the temptation to use a wire wheel or a scotch-brite pad to speed things up. Don’t give in to that urge. Most motorcycle engines use aluminum for the engine block and covers. These will be easily damaged by more aggressive methods of removing the gasket. Even a few thousandths of an inch out of flat can cause the gasket to fail to seal and a new part will need to be sourced. Put on some music, work slowly, methodically, and carefully, and the job will get done right.
Over time, with experience, you will get the feel for this and the process will get quicker. I find the process to be relaxing, a sort of motorcycle maintenance mediation. Anyways, good luck out there, have fun, and Godspeed.

About the author: Eric is an incurable motorcycle nut. He’s owned and wrenched on everything from vintage scooters and vintage motocross bikes to modern machines, and now spends much of his time riding and talking about adventure motorcycles. If you have called the Touratech store in Seattle or called the offices, chances are you’ve talked to Eric. Eric came in second place in the adventure class at the Stumpjumper Desert 100 Race in 2014, and recently finished the 2015 race in eighth place in the same class. He is a key part of the Touratech race team, and when he’s not racing a local hare-scramble or vintage motocross race, or working on motorcycles in his garage, he can be found roaming the Cascade mountains on his KTM 950 Adventure looking for new routes for the annual Touratech Rally.
To read more of Archambault’s Angle CLICK HERE.